


Authentication is one of the most important aspects of any application we are building, In most tutorials, authentication is usually treated last, and in most of my personal projects, it's one of the last things I implement. However, I'm turning things on their head and I'm going to implement authentication first. In the previous article, we set up our project and created our user model which looks something like this
import { model, Schema } from "mongoose";
import { IUser } from "./user.interface";
import validator from "validator";
import bcrypt from "bcryptjs";

const userSchema: Schema = new Schema<IUser>({
  email: {
    type: String,
    required: [true, "Email is a required field for user"],
    unique: true,
    lowercase: true,
    validate: [validator.isEmail, "Email provided is not valid"],
  },
  password: {
    type: String,
    required: [true, "please provide a password"],
    minlength: 8,
  },
  username: {
    type: String,
    unique: true,
    required: [true, "username is a required field for user"],
  },
  firstname: {
    type: String,
    required: [true, "firstname is a required field for user"],
  },
  lastname: {
    type: String,
    required: [true, "lastname is a required field for user"],
  },
  active: {
    type: Boolean,
    default: true,
  },
});

userSchema.pre("save", async function (next) {
  if (!this.isModified("password")) return next();
  this.password = await bcrypt.hash(this.password, 12);
  next();
});

const User = model<IUser>("User", userSchema);
export default User;
The next step is to set up our authentication controllers and routes and then configure our express server to use them.
Authentication Controller
Our controllers contain our logic to actually carry out the functionality we need, in this case, we need users to be able to register and log in. We also need to set up the functionality to prevent unauthenticated users from accessing the parts of our application we want to be secured. Our authentication controller will hold all the code that implements these features.
Auth Controller Interfaces
In our src directory let's create a new directory called controllers. In the new directory, we will create a new file called authController.ts The first thing we need to do is to bring in some imports, we need the user model we created earlier in our user.ts file, we also need to declare some types that we will need for our controller. We will define the types in a new file called authController.interface.ts so create that file in the same directory as our authController.ts file
Our interface.ts file will contain the type definitions for the type of information we need from a user to register and log in, so we need to determine what information the user has to give us to register and log in. When registering the user has to provide their first name, last name, email, password and username which are all strings, and when logging in, they have to provide their username and password, so we will define interfaces which will represent the individual types for the information we are expecting.
export interface IRegistrationRequest {
  firstname: string;
  lastname: string;
  email: string;
  username: string;
  password: string;
}

export interface ILoginRequest {
  username: string;
  password: string;
}
Register method
After defining our interfaces, we can now use them in the registration method of our authentication controller. Like with all express handler methods, our registration method has access to the request and response objects as well as the next function. Since we are using TypeScript all parameters in our registration function should be typed, so we will import the necessary types from express. We also need to import the user model from our user.ts file so we can use it to create new user objects. Finally, we need to import the IRegistrationRequst and ILoginRequest from our type definition file, so we can use them in our authentication controller.
import User from "../models/user";
import { Request, Response, NextFunction } from "express";
import {
IRegistrationRequest,
ILoginRequest,
} from "./authController.interface";
export const register = async (
req: Request,
res: Response,
next: NextFunction
) => {
try {
const registrationRequest: IRegistrationRequest = req.body;
const newUser = await User.create({
email: registrationRequest.email,
password: registrationRequest.password,
username: registrationRequest.username,
firstname: registrationRequest.firstname,
lastname: registrationRequest.lastname,
});
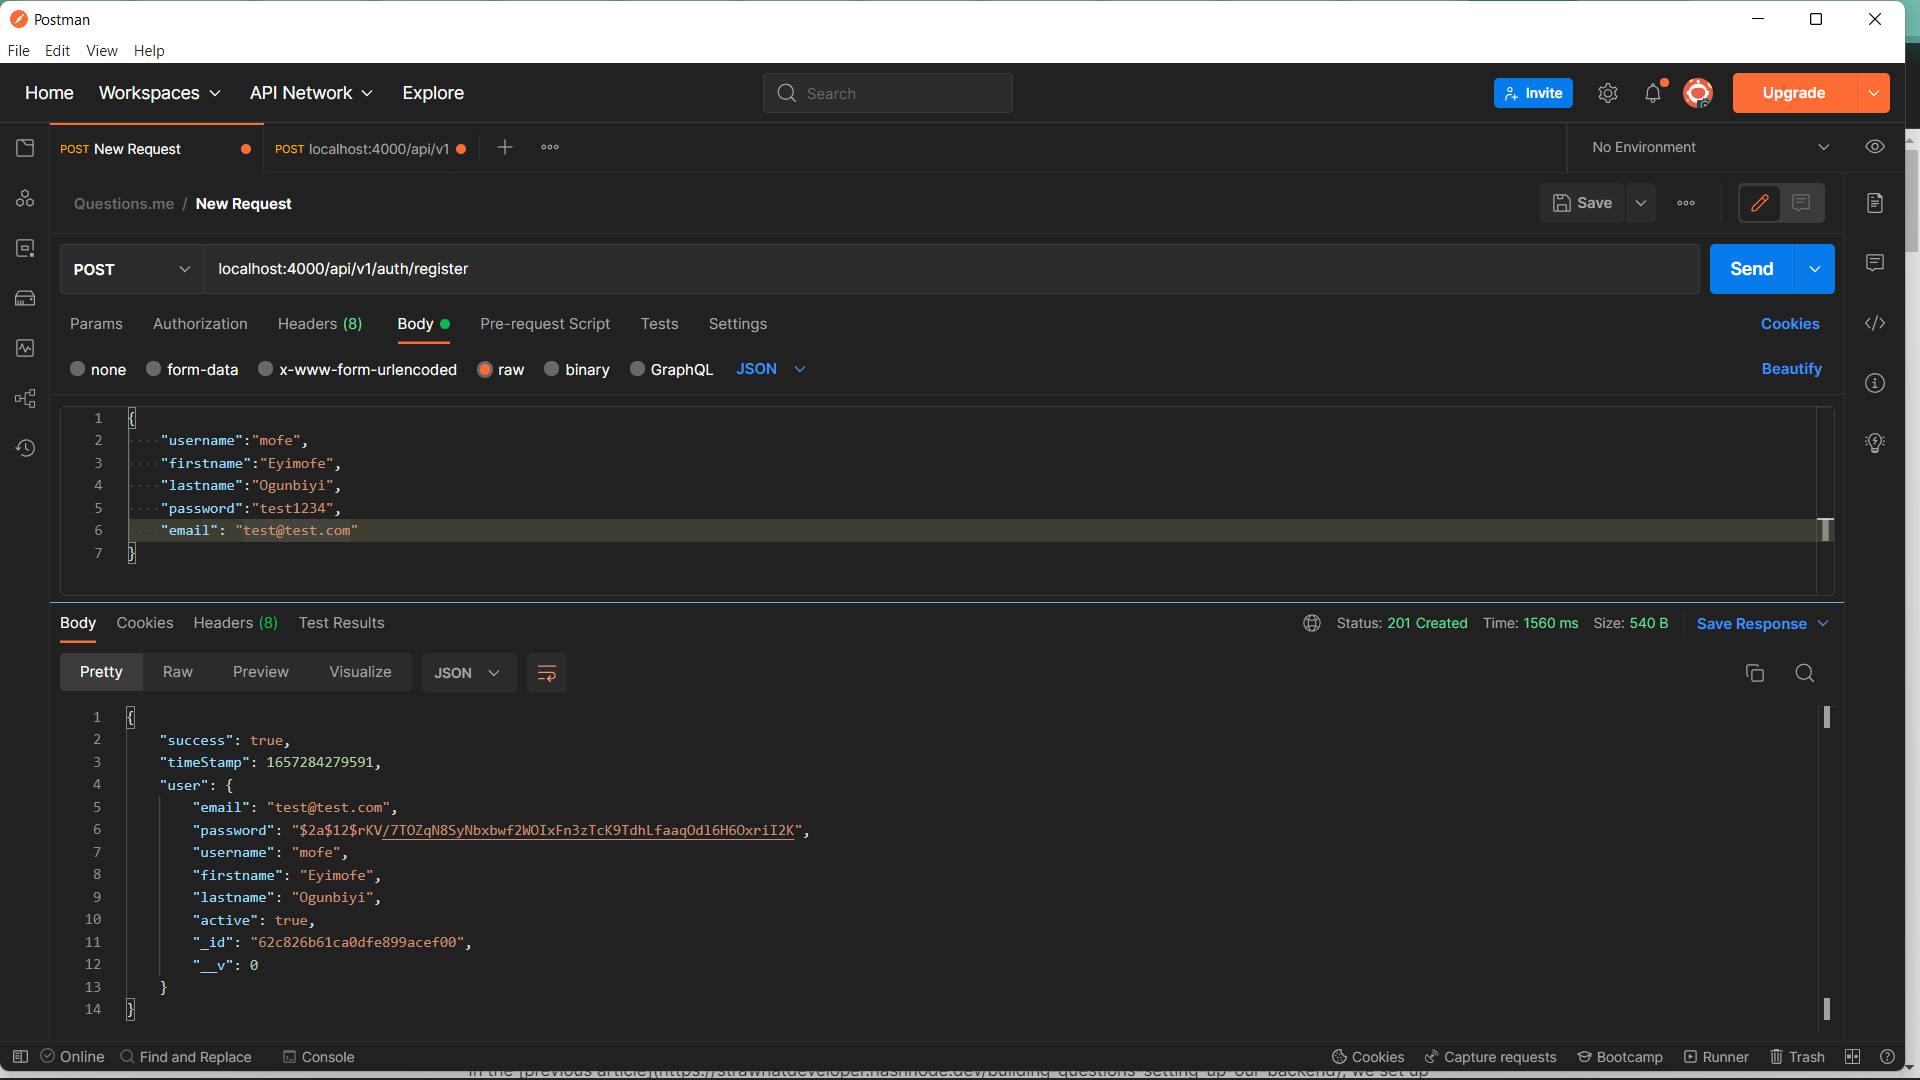
res.status(201).json({
success: true,
timeStamp: Date.now(),
user: newUser,
});
} catch (e: unknown) {
const error = e as Error;
console.log(error.message);
res.status(400).json({
success: false,
timeStamp: Date.now(),
message: error.message,
});
}
};
Let's go over our register method in bits. The first thing we do is define the function and the parameters it accepts, note that we are exporting the function after definition because we will need this function in another file. After defining our function signature and specifying the parameter types, we create a try-catch block. In the try block, we first attempt to extract a registration request from the request body, our registration request variable is of type IRegistrationRequest which is the interface we defined earlier containing the fields we require from the user when registering. As a result of the type we specified, TypeScript will extract the fields specified in the IRegistrationRequest and place them in our variable. Consequently, we will have a fully populated object that contains all the required fields.
Note: At this point, you could do some validation on the registration request object to check that the fields are not null, or that the passed-in values are valid, but I chose not to because, we have already added some validations to the user schema itself, and it would be redundant in my opinion. If you want to however you are more than welcome to try.
After extracting the passed-in data from the request body, we use the imported user model to create a new user object. We are using the create method on the user object, which creates the model for us and saves it to our database if the schema validations pass.
If our save operation was successful, we then return a response back to the user with a 201 status code and some data as JSON. The returned data contains the details of the user, a timestamp and a success flag.
Next comes our catch block, this block is only executed if there were any errors thrown while executing the try block. In our catch block, we are accepting an error object of type unknown. We use type unknown here because apparently, TypeScript can only catch errors of type unknown or any. Within the catch block, the first thing we do is to cast the unknown e object back to an object of type Error, then we return a response to the user with the success flag set to false an error message which we extract from the error object and a status code of 400.
With that we are done with the register method of our authentication controller, let's move on to the login method.
Login Method
Our login method will follow a similar pattern as our register function we will extract some data from the request body, process it, and then return a success response, if there were any errors during the processing we will return a failure response.
Before we start writing the function, we need to bring in some imports, so at the top of our file, we add the following
import bcrypt from "bcryptjs";
import jwt from "jsonwebtoken";
bcrypt is the package we use to encrypt passwords, since storing passwords in plain text is a big no-no. we can also use this package to compare plain text passwords with their encrypted versions. Jwt on the other hand is a package used to generate and verify JWT tokens. I'm really not going to go into what JWT tokens are and how they work, cause I assume you have a little understanding of how they work. If you don't check out this link
export const login = async (
req: Request,
res: Response,
next: NextFunction
) => {
try {
const loginRequest: ILoginRequest = req.body;
if (!loginRequest.username || !loginRequest.password) {
throw new Error("Username and Password must be provided");
}
const user = await User.findOne({ username: loginRequest.username });
if (!user) {
throw new Error("No user found with that username");
}
const passwordMatch = await bcrypt.compare(
loginRequest.password,
user.password
);
if (!passwordMatch) {
throw new Error("Incorrect password provided");
}
const token = signToken(user._id.toString());
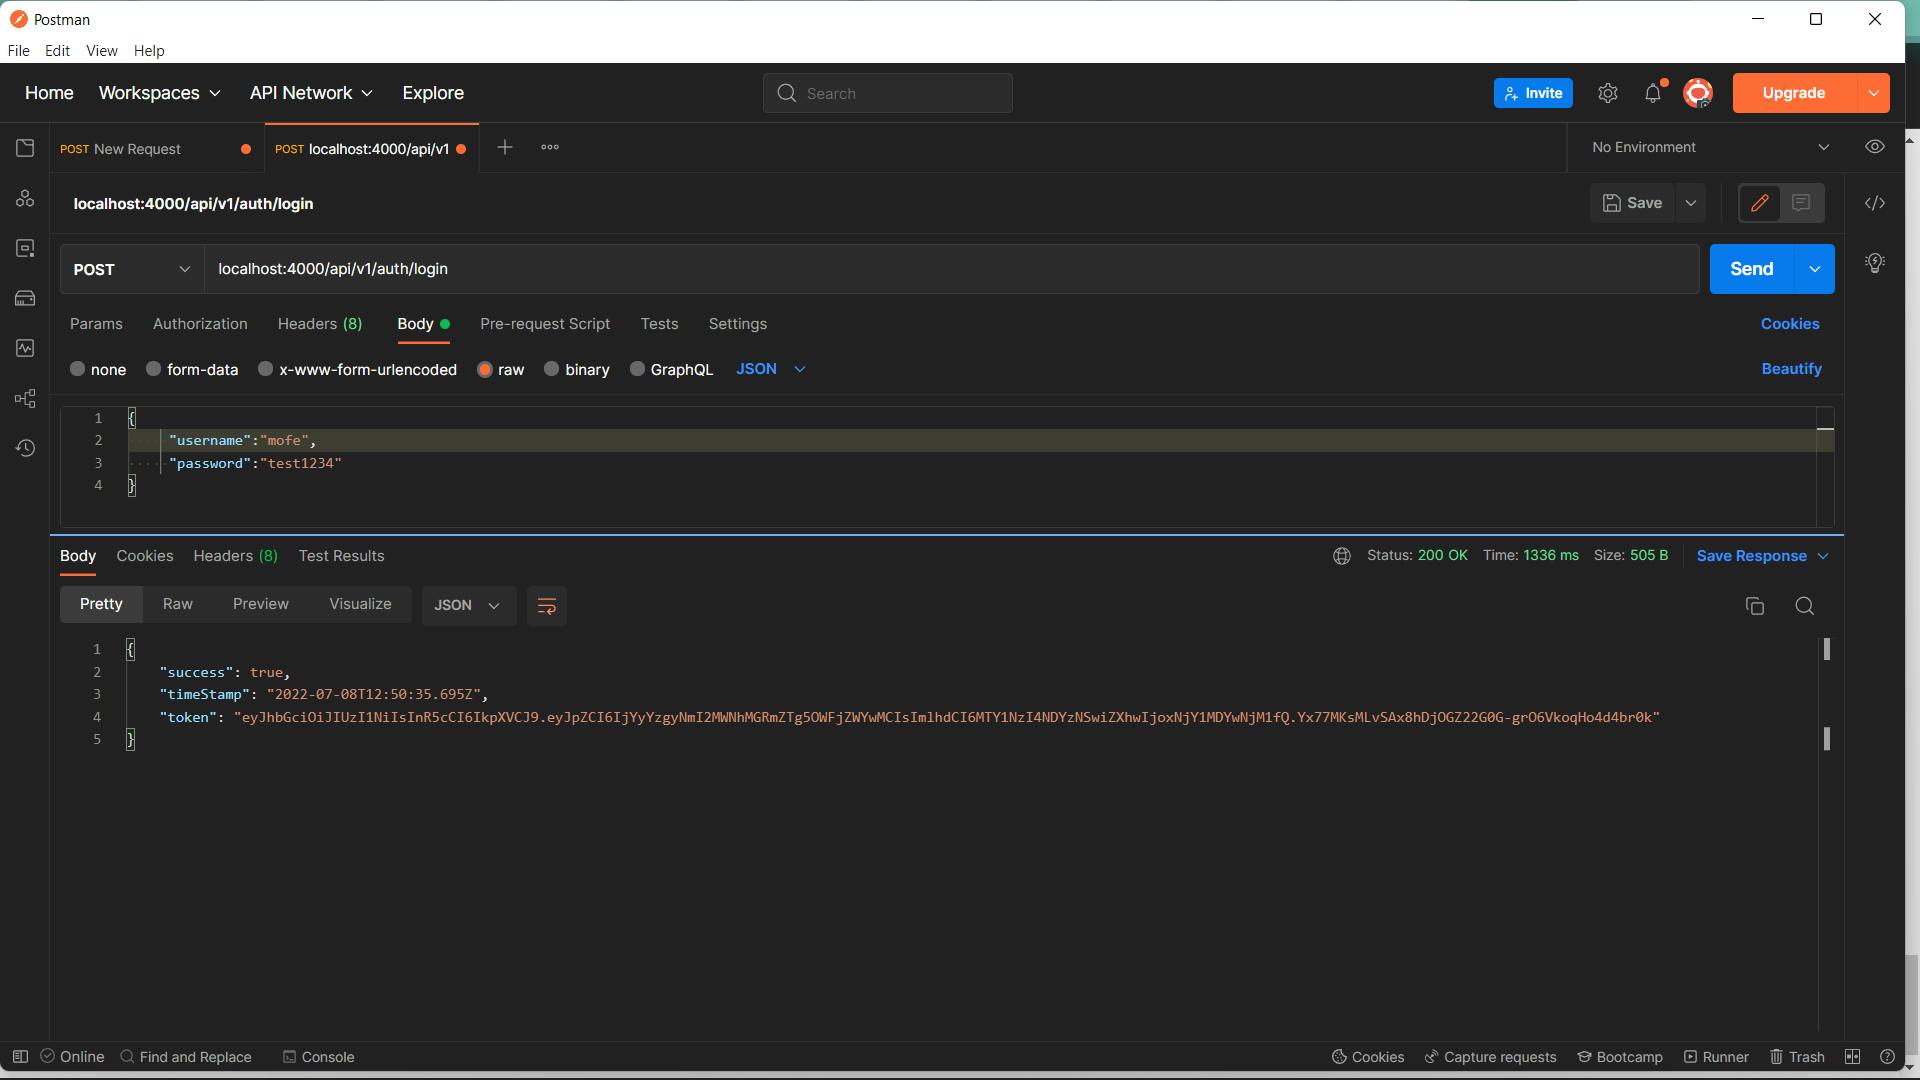
res.status(200).json({
success: true,
timeStamp: new Date(),
token,
});
} catch (e: unknown) {
const error = e as Error;
console.log(error.message);
res.status(400).json({
success: false,
timeStamp: Date.now(),
message: error.message,
});
}
};
Like we did in our register method, we use an object of type ILoginRequest to extract the required information from the request body, once we have that information, we need to perform some validations. The first validation we do is ensure that the username and password values are present in the login request, if they are;t we throw a new error with the appropriate error message. Note whenever we throw a new error the rest of the code in the try block is skipped and we move directly to the catch block which will return an error response to the user.
The next thing we do is try to find a user that has the username provided in the login request. We use the user model to perform a findOne query on our database. This method will return the first user object that matches the passed-in query which is {username: loginRequest.username} The findOne method is an async operation, so we need to await it, once we get a result back we check to see if the returned user is null, if it is, this means that we did not find any user who matched our query, so we throw a new error with the appropriate error message.
The next thing we do is to compare the password on the returned user object password which is encrypted with the password the user passed into the login request. Since we are comparing a plain text password with an encrypted version we use bcrypt to perform the comparison, the compare method returns a boolean indicating if the passwords match and since it is an async method we need to await the result. If the returned boolean is false we again throw an error indicating that the password provided was incorrect. If the returned boolean was true, we move on to generating a unique token for the user which he will use to access the rest of the application, we generate this token in the signToken method which accepts the id of the user we want to generate the token for. We obtain the id from the user object returned to us by our findOne method. However, the id stored in the user object is of type objectId which is the type MongoDB used to store id fields on records, so we convert the id from objectId to a string by calling its to string method.
Let's take a look at what happened in our signToken method
const signToken = (id: string) => {
  const jwtSecret = process.env.JWT_SECRET as string;
  return jwt.sign({ id }, jwtSecret, {
    expiresIn: process.env.JWT_EXPIRES_IN,
  });
};
In the method, we use our JWT_SECRET environment variable to sign our JWT token and embed the user's ID in the token we also set the expiresIn property to the value coming from our JWT_EXPIRES_IN environment variable, and then we return the signed token to the function caller.
After our signToken method returns, we return a success response to the user with the token embedded.
Authentication Router
After completing our authentication controller, the next step is to create the routes and map them to their respective authentication controller functions. To do this, we create a new directory inside src called routers. Inside this directory, we create a new file called authRouter.ts inside this file, we have the following
import express from "express";
import { register, login } from "../controllers/authController";

const authRouter = express();

authRouter.route("/register").post(register);
authRouter.route("/login").post(login);

export default authRouter;
In the code above, we simply create a new router by calling the express function, next we create a specific route called /register and specify that whenever a post request is made to that route, we want to invoke the register method which we imported from the authController We do the same thing for our login route.
Finally, we export our auth router so we can use it in another file.
Putting It All Together.
After creating our router and exporting it, we need to hook up the configured routes to our express server. To do this we go back to our app.ts file and import the authRouter there.
import express from "express";
import bodyParser from "body-parser";
import dotenv from "dotenv";
import cors from "cors";
import authRouter from "./routers/authRouter";  // we import the newly created authRouter

dotenv.config({ path: "./config.env" });

const app = express();
app.use(cors());
app.use(express.json({ limit: "10kb" }));
app.use(bodyParser.urlencoded({ limit: "10kb", extended: false }));

app.use("/api/v1/auth", authRouter); // we add the authRouter to our application.

export default app;
After importing the auth router, we tell our express application to use it by calling the use method and passing in a parent route and the auth router we imported.
The parent route is appended to all configured routes in our auth router, so now our register endpoint is accessible via /api/v1/auth/register and our login endpoint is accessible via /api/v1/auth/login
Now that we've set up our application we can start it by running npm run dev this will start up nodemon and our TypeScript compiler. Our application will now be running on port 4000 or whatever port you configured.
If we send a post request to our registration endpoint, we should be able to successfully create a new user and we should also be able to log in if we send a post request to our login endpoint
In this article, we've been able to see how to implement basic authentication on our application, our users can now create accounts and can log in to their accounts, but they can't do much more, we still have to implement the functionality for users to be able to reset or change their passwords, we also need to add some functionality that will help us restrict user access to endpoints that require authentication, but before we love on that, I want to take a small detour to refactor our current application. One major thing that stands out right now is our current error handling strategy, the way it's currently implemented we handle all errors within the controller methods, while this is fine for now, I've always been a fan of centralized error handling. What that simply means is having a single file or class which contains the error handling logic for our entire application. Luckily express gives us a way to implement this with a global error handler. In the next article, we will implement this global error handling, and see how it makes error handling much easier.
SO until next time 💖 & 💡